The Irresistible Aroma of Italian Herbs and Cheese Bread
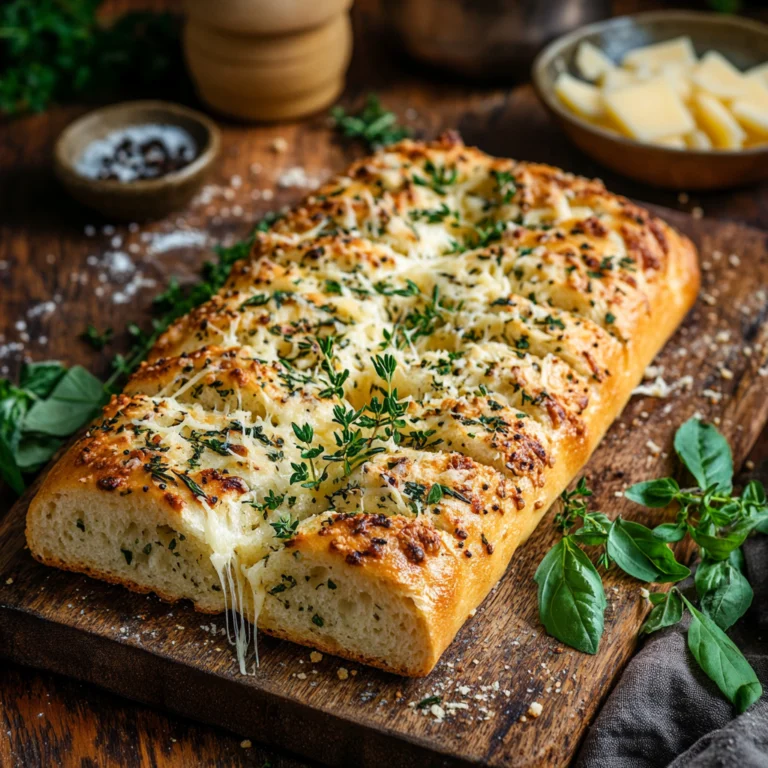
There’s nothing quite like the smell of freshly baked bread wafting through your kitchen, especially when it’s infused with the earthy aroma of Italian herbs and topped with melty, golden cheese. Italian Herbs and Cheese Bread is more than just a loaf—it’s an experience. Each slice combines a soft, fluffy interior with a slightly crisp crust, enhanced by the savory blend of oregano, basil, and parsley. Whether served as a side dish, the base for a hearty sandwich, or simply enjoyed on its own, this bread is sure to elevate any meal.
What makes this bread so special is its versatility and timeless appeal. Its Italian-inspired flavors pair beautifully with pasta, soups, or a charcuterie spread, making it a go-to for family dinners or entertaining guests. And let’s not forget its star quality in sandwiches, where it adds a burst of flavor to every bite.
Why Bake It at Home?
While store-bought options are convenient, there’s a unique joy in making Italian Herbs and Cheese Bread from scratch. Baking at home means you can choose the freshest ingredients, adjust the flavors to suit your preferences, and avoid unnecessary additives. Plus, the process itself is immensely rewarding, from kneading the dough to watching it rise and brown in the oven.
Homemade bread doesn’t just taste better—it brings a sense of accomplishment. The combination of melted cheese, fragrant herbs, and warm, fresh-baked dough is something no store can replicate. Once you’ve tried it, you’ll wonder why you ever settled for anything less.
For those new to bread making, consider exploring some easy and creative ideas such as these sweet breakfast recipes to build your confidence in the kitchen.
Ready to make your own? Let’s start by gathering the essential ingredients that make Italian Herbs and Cheese Bread so delicious
Essential Ingredients for Italian Herbs and Cheese Bread

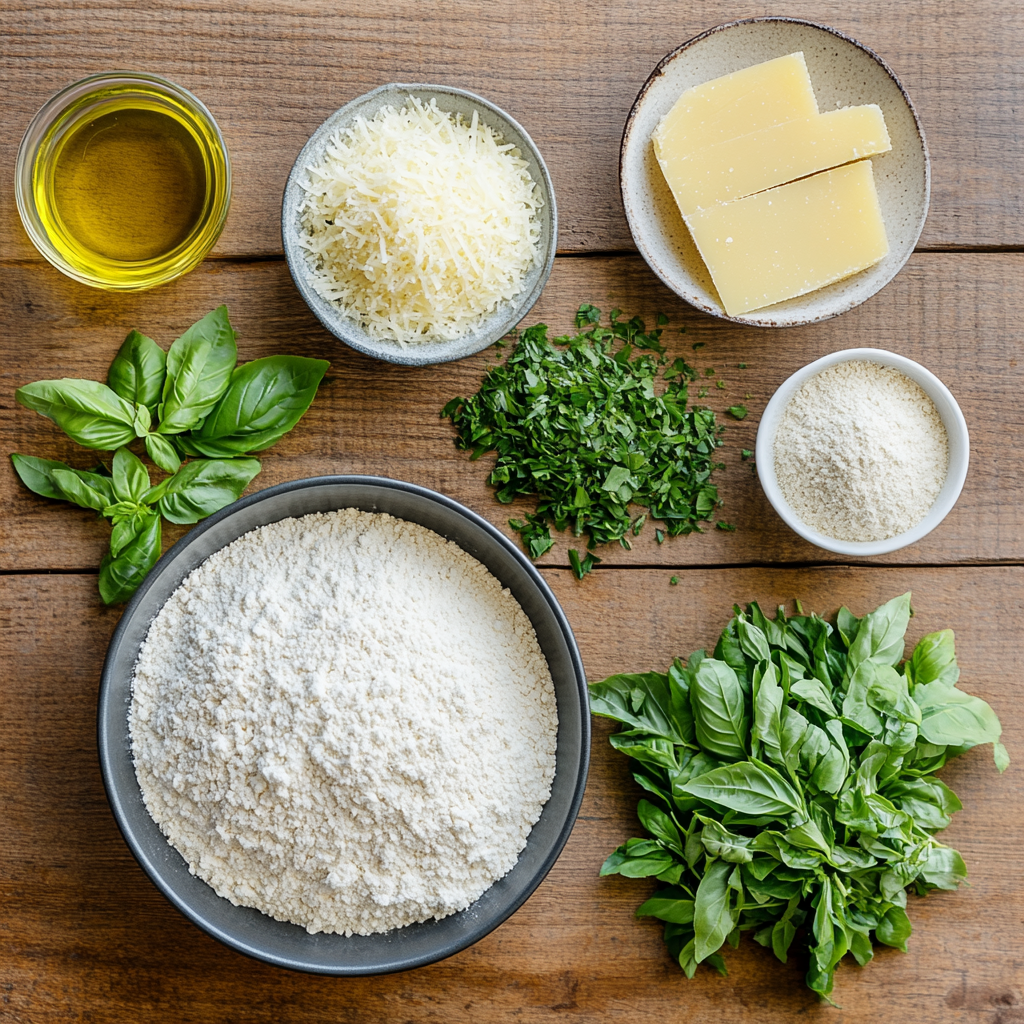
To create Italian Herbs and Cheese Bread that rivals your favorite bakery, it’s important to start with the right ingredients. Each component plays a key role in achieving the perfect flavor, texture, and aroma. Let’s break down what you’ll need and how to make the most of each ingredient.
1. Core Components
- Bread Flour: Bread flour is ideal for this recipe because of its higher protein content, which creates a chewier, more structured loaf. If you don’t have bread flour, all-purpose flour can be used, though the texture will be slightly different.
- Yeast: Active dry yeast or instant yeast works well. Ensure it’s fresh for the best rise. If using active dry yeast, dissolve it in warm water with a pinch of sugar before adding it to the dough.
- Warm Water: The temperature should be between 105°F and 110°F to activate the yeast. Too hot, and you risk killing the yeast; too cold, and it won’t activate properly.
- Sugar: A small amount of sugar helps feed the yeast and adds a subtle sweetness to balance the savory flavors.
- Salt: Enhances the overall flavor of the bread and balances the richness of the cheese.
2. Herb and Cheese Selection
- Italian Herbs: The combination of oregano, basil, parsley, and thyme is what gives this bread its signature flavor. Feel free to adjust the blend to your taste or add a pinch of rosemary for an extra aromatic twist.
- Cheese: Parmesan is a classic choice for its salty, nutty flavor, but you can also use mozzarella, Monterey Jack, or Asiago for a melty finish. For a bolder taste, mix in sharp cheddar or a dash of Pecorino Romano.
3. Additional Ingredients and Substitutions
- Olive Oil: Adds moisture and a slight richness to the dough. A high-quality olive oil can enhance the flavor.
- Butter: Brushed on top of the loaf after baking, butter adds a glossy finish and extra indulgence.
- Substitutions: For a healthier version, substitute whole wheat flour for half the bread flour. For a vegan option, use a plant-based cheese and olive oil instead of butter.
4. Ingredient Tips for Success
- Freshness is Key: Use fresh herbs and high-quality cheese for the best flavor. Dried herbs work well, but fresh herbs take the bread to another level.
- Grate Your Own Cheese: Pre-shredded cheese often contains anti-caking agents that can affect melting. Grating cheese yourself ensures a smoother, creamier topping.
- Room Temperature Ingredients: Bring all ingredients to room temperature before starting to help the dough mix evenly and rise properly.
For additional flavor inspirations, you might find these puff pastry breakfast recipes an interesting variation.
With your ingredients ready, it’s time to dive into the fun part: crafting your Italian Herbs and Cheese Bread step by step.
Step-by-Step Instructions for Italian Herbs and Cheese Bread

Now that you’ve gathered your ingredients, it’s time to transform them into a fragrant, golden loaf of Italian Herbs and Cheese Bread. Follow these simple steps for foolproof results, and enjoy the process of creating this irresistible bread from scratch.
1. Preparing the Dough
Start by activating the yeast. In a large bowl, combine 1 cup of warm water (105–110°F) with 1 teaspoon of sugar and 2 1/4 teaspoons of active dry yeast. Stir gently and let it sit for 5–10 minutes until the mixture becomes foamy. This step ensures your yeast is alive and ready to work its magic.
In a separate large mixing bowl or the bowl of a stand mixer, combine 3 1/2 cups of bread flour and 1 1/2 teaspoons of salt. Gradually add the activated yeast mixture and 2 tablespoons of olive oil. Mix until the dough comes together.
2. Kneading the Dough
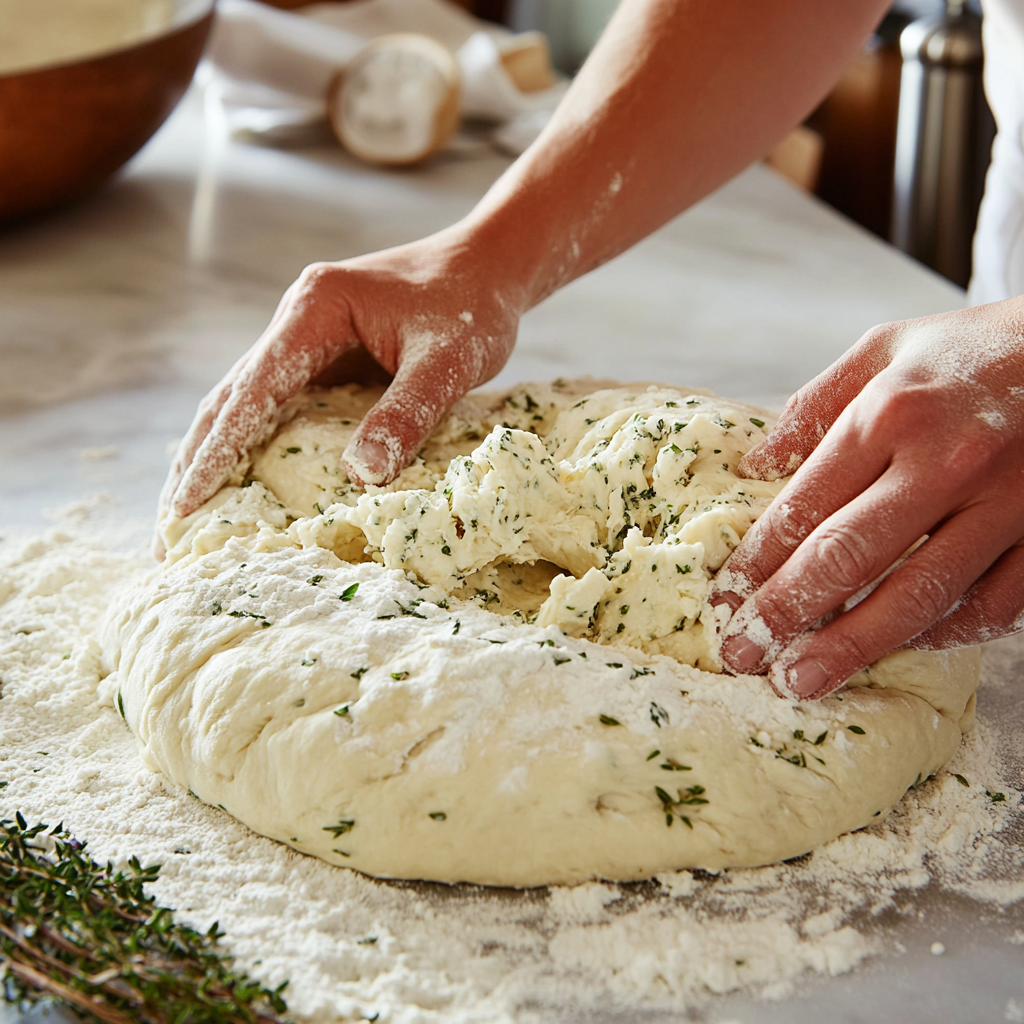
If using a stand mixer, attach the dough hook and knead on medium speed for about 6–8 minutes until the dough is smooth and elastic. For hand-kneading, transfer the dough to a lightly floured surface and knead for 10 minutes. The dough should feel soft and slightly tacky but not sticky.
3. First Rise
Place the kneaded dough in a lightly oiled bowl, turning it once to coat the surface. Cover the bowl with a clean kitchen towel or plastic wrap and let it rise in a warm, draft-free area for about 1 hour, or until doubled in size.
For even more savory options, don’t miss out on recipes like this homemade beef sausage to pair with your bread.
4. Shaping the Dough
After the dough has risen, punch it down gently to release any air bubbles. Turn it out onto a floured surface and divide it into two equal portions for two loaves, or keep it whole for a single large loaf. Shape the dough into your desired form—oval loaves, a round boule, or even braided bread. Place the shaped dough onto a parchment-lined baking sheet or into a greased loaf pan.
5. Adding the Herb and Cheese Topping
In a small bowl, combine 2 tablespoons of olive oil, 1/2 teaspoon of dried oregano, 1/2 teaspoon of dried basil, and 1/4 teaspoon of garlic powder. Brush this mixture evenly over the top of the dough. Sprinkle generously with 1 cup of grated cheese (Parmesan, mozzarella, or your preferred mix).
6. Final Rise
Cover the shaped and topped dough with a kitchen towel and allow it to rise again for 20–30 minutes. This second rise helps the bread develop its final shape and texture.
7. Baking the Bread
Preheat your oven to 375°F (190°C). Once the dough has risen, bake the bread for 25–30 minutes if making smaller loaves, or 35–40 minutes for a larger loaf. The bread is done when the top is golden brown, the cheese is bubbly, and a tap on the bottom of the loaf sounds hollow.
8. Cooling and Serving
Remove the bread from the oven and let it cool on a wire rack for at least 10 minutes before slicing. This allows the flavors to settle and the interior to set. Serve warm for the best experience, paired with butter, olive oil, or your favorite meal.
Pro Tips for Success
- Monitor the oven during baking to ensure the cheese doesn’t burn. Cover the bread loosely with foil if the top browns too quickly.
- For an extra golden crust, brush the bread with melted butter immediately after removing it from the oven.
With your fresh loaf cooling and ready to enjoy, let’s explore some creative ways to customize your Italian Herbs and Cheese Bread to make it uniquely yours.
Tips to Customize Your Italian Herbs and Cheese Bread
One of the joys of making Italian Herbs and Cheese Bread at home is the opportunity to customize it to your tastes. With a few tweaks, you can create a loaf that’s uniquely yours, whether you prefer bold flavors, alternative shapes, or an entirely different vibe. Here are some tips to help you get creative.
1. Experiment with Flavor Variations
- Garlic Lovers’ Twist: Add minced garlic or roasted garlic cloves directly into the dough for a deeper, richer flavor.
- Sun-Dried Tomato Infusion: Finely chop sun-dried tomatoes and knead them into the dough to introduce a tangy, Mediterranean flair.
- Spicy Kick: Sprinkle crushed red pepper flakes or add a dash of cayenne to the herb mixture for a hint of heat.
- Herb Substitutions: Swap traditional Italian herbs with fresh rosemary, thyme, or even a sprinkle of dill for a new flavor profile.
2. Play with Cheese Combinations
- Classic Upgrade: Blend Parmesan with Asiago or Pecorino Romano for a more robust flavor.
- Melty Favorites: Try mozzarella, Monterey Jack, or Gruyère for a softer, gooier topping.
- Blue Cheese Lovers: Add crumbles of Gorgonzola or blue cheese for a bold, tangy twist.
3. Explore Different Shapes and Presentations
- Braided Loaf: Divide the dough into three strands, braid them together, and top with herbs and cheese. The result is both elegant and impressive.
- Individual Rolls: Shape the dough into small balls and bake them as individual rolls, perfect for serving alongside soup or salad.
- Stuffed Bread: Roll out the dough, spread a thin layer of cheese and herbs, and roll it back up before shaping. This creates a swirl of flavor throughout the loaf.
4. Serve It in Style
- Perfect Pairings: Serve slices with pasta, soups, or charcuterie boards to complement the bread’s Italian-inspired flavors.
- Sandwich Base: Use the bread for paninis or cold sandwiches to take your lunch game to the next level.
- Toast and Dip: Toast slices and serve with marinara sauce, olive oil, or a balsamic vinegar dip for a quick appetizer.
With your bread now fully customized to your preferences, let’s answer some common questions to ensure your baking process is smooth and successful.
Frequently Asked Questions About Italian Herbs and Cheese Bread
Homemade bread can sometimes spark questions, especially for new bakers. Here are answers to some of the most common inquiries to help you confidently bake the perfect Italian Herbs and Cheese Bread.
1. Can I use all-purpose flour instead of bread flour?
Yes, all-purpose flour works, but bread flour provides a chewier texture due to its higher protein content. For the best results, try using a mix of both if you don’t have bread flour
2. How do I store leftover bread?
Wrap the cooled bread in plastic wrap or place it in an airtight container. Store it at room temperature for up to 3 days. For longer storage, freeze it for up to 3 months, and thaw at room temperature when ready to use.
3. Can I make this bread without a stand mixer?
Absolutely! Hand-kneading works just as well. It may take a bit more effort (about 10 minutes), but the results are equally satisfying.
4. What herbs are typically used in this bread?
Oregano, basil, parsley, and thyme are traditional choices. Feel free to mix and match according to your preferences or what you have on hand.
5. Can I prepare the dough in advance?
Yes, you can refrigerate the dough after the first rise. Let it come to room temperature before shaping and baking.
6. Is it possible to make this bread gluten-free?
Yes! Use a gluten-free flour blend designed for bread baking and ensure all other ingredients are gluten-free. Be mindful of the texture, as gluten-free dough may behave differently.
With these questions answered, you’re fully equipped to bake with confidence. Let’s wrap up with a summary and some encouragement to try this recipe yourself.
Conclusion: A Bread Worth Baking
Italian Herbs and Cheese Bread is more than just a recipe—it’s an opportunity to bring a touch of Italy into your home. From the fragrant herbs and the gooey, golden cheese topping to the satisfaction of kneading and baking, every step is a rewarding experience. The final result is a loaf bursting with flavor, perfect for enhancing any meal or simply enjoyed on its own.
By following this guide, you’ve learned how to craft a loaf with a soft, airy interior and a crisp, cheesy crust. You’ve explored ways to customize the recipe to suit your personal tastes, whether by adding bold flavors, experimenting with different cheeses, or shaping the dough in creative ways.
Now it’s your turn! Gather your ingredients, roll up your sleeves, and bake a loaf that’s uniquely yours. Share it with loved ones, pair it with your favorite dishes, or simply savor it fresh from the oven. And don’t forget to experiment—this bread is as versatile as it is delicious.
Baking your own Italian Herbs and Cheese Bread is a journey worth taking. Try it today and enjoy the delicious aroma and taste of homemade perfection.

