Introduction
The Allure of Banana Split Cake
When it comes to nostalgic desserts, few can compete with the timeless charm of the banana split. This beloved classic, known for its vibrant layers of fruit, ice cream, and decadent toppings, has been a favorite treat across generations. But what if you could enjoy all the delightful flavors of a banana split in the form of a creamy, no-bake cake? Enter the banana split cake—a dessert that takes everything you love about the original and transforms it into an easy-to-make, shareable delight perfect for any occasion.For additional inspiration on dessert creations, explore these sweet breakfast recipes.
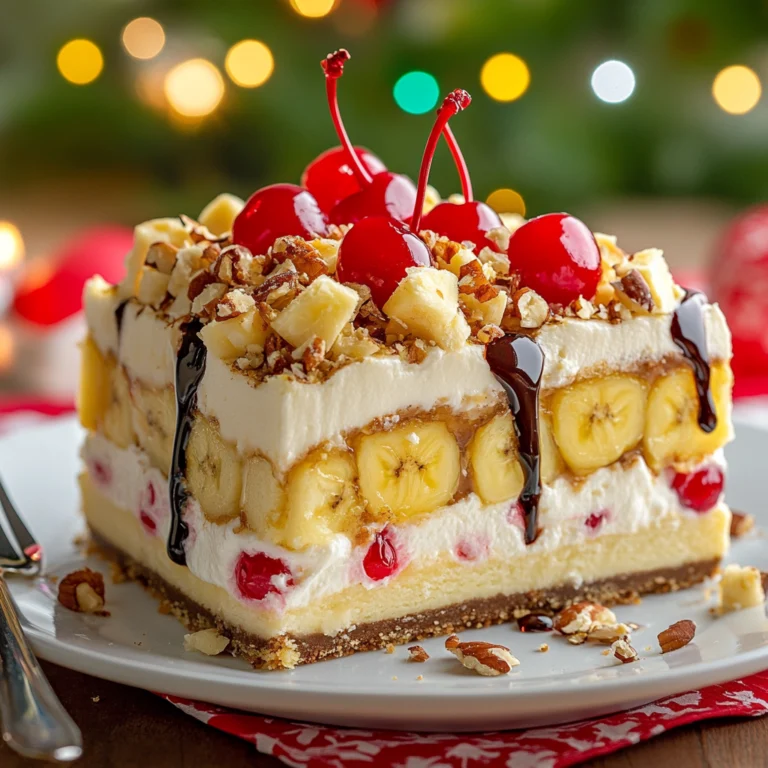
Banana split cake isn’t just a dessert—it’s a centerpiece. Whether you’re hosting a summer barbecue or attending a family potluck, this colorful, layered treat never fails to impress. Its refreshing combination of fruit, cream, and crunch makes it ideal for warm-weather gatherings, while its no-bake simplicity means it’s a breeze to whip up, even on short notice.
Table of contents
Why Banana Split Cake is the Perfect No-Bake Dessert
Banana split cake brings together the best of two worlds: the indulgence of a classic banana split and the ease of a no-bake dessert. The layers of graham cracker crust, creamy filling, fresh bananas, and fruity toppings come together effortlessly, requiring no oven time and minimal prep. It’s an ideal solution for those looking to create a show-stopping dessert without breaking a sweat in the kitchen.For a classic no-bake option, see our puff pastry breakfast recipes.
Another reason banana split cake stands out is its versatility. You can customize the toppings to suit your taste, swap in gluten-free ingredients, or even experiment with alternative bases like crushed Oreos. No matter how you tweak it, one thing is certain: every bite delivers a burst of flavor and texture that keeps guests coming back for seconds (and thirds!).
With this guide, you’ll learn everything you need to know to make your own banana split cake at home. From choosing the right ingredients to mastering the perfect presentation, you’ll be able to recreate this no-bake wonder with confidence. Let’s dive in!
Now that you’re inspired to try this no-bake delight, let’s explore the essential ingredients that bring banana split cake to life.
Essential Ingredients for Banana Split Cake
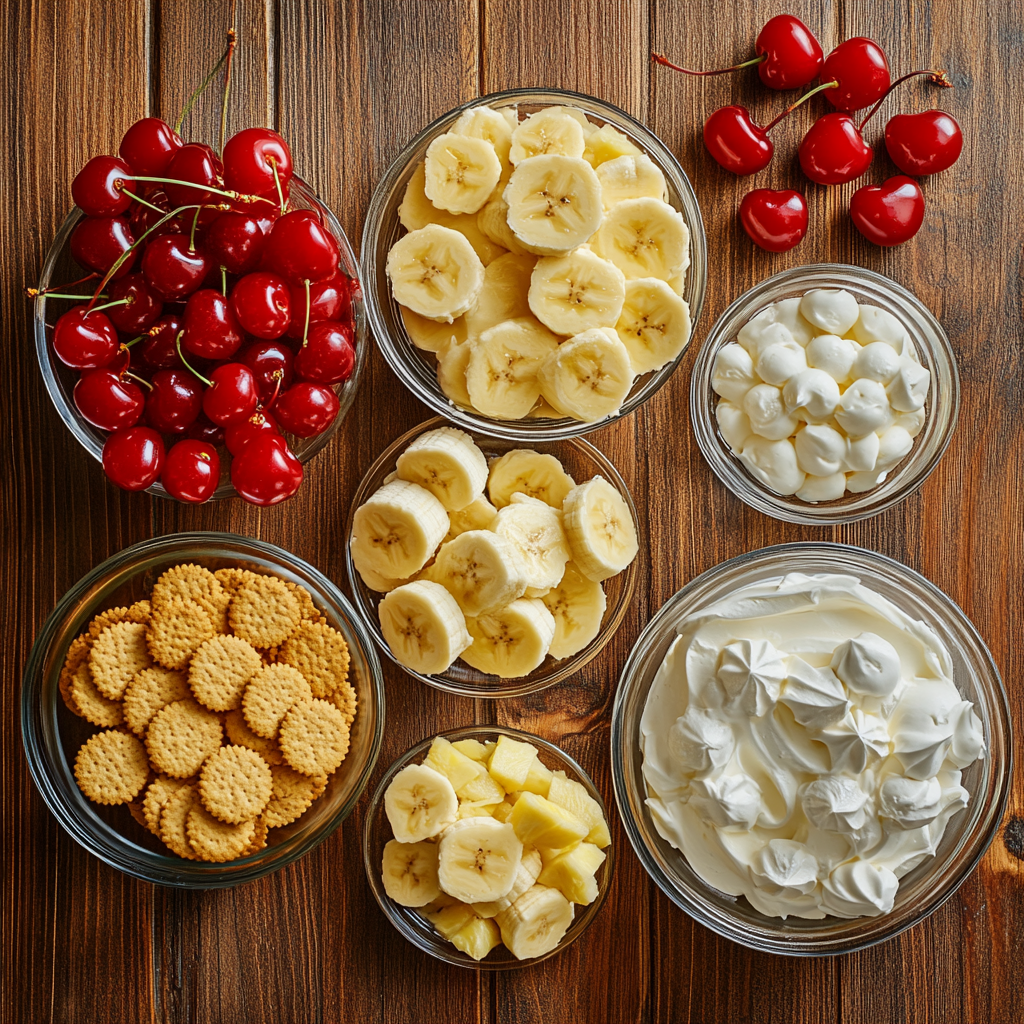
Banana split cake is a harmonious blend of layers, each contributing to its rich flavor and satisfying texture. While it’s a straightforward recipe, selecting the right ingredients is crucial to achieving the perfect balance. Let’s break down the components that make this dessert a crowd-pleaser.

1. The Foundation: Crust Components
The base of the banana split cake sets the stage for the layers above. Traditionally, a graham cracker crust is used for its sweet, slightly nutty flavor and sturdy texture. Here’s what you’ll need:
- Graham Cracker Crumbs: Provide a crisp yet tender base. You can also substitute crushed vanilla wafers or Oreos for a twist.
- Butter: Acts as a binder, giving the crust its structure and rich flavor.
- Sugar: Adds a touch of sweetness to balance the butter’s richness.
Pro Tip: To prevent the crust from getting soggy, chill it in the refrigerator after pressing it firmly into the pan. Some bakers recommend adding a thin layer of melted chocolate to seal the crust for extra protection and flavor.
2. Creamy Layers: Filling Ingredients
The creamy filling is the heart of the banana split cake. It provides the velvety smooth texture that ties the dessert together.
- Cream Cheese: Adds tanginess and structure to the filling. Soften it before mixing to ensure a smooth consistency.
- Confectioners’ Sugar: Dissolves easily, sweetening the filling without grittiness.
- Whipped Topping: Creates a light, airy texture. You can use store-bought whipped topping or make your own with heavy cream for a fresher taste.
Why It Works: This layer provides a cool, creamy contrast to the crust and fruity toppings, mimicking the ice cream in a traditional banana split.
3. Fruity Additions: Classic Banana Split Toppings
What’s a banana split without fruit? The fresh produce in this cake adds bursts of flavor and color.
- Bananas: The star of the show. Choose ripe but firm bananas for optimal sweetness and texture.
- Crushed Pineapple: Drained thoroughly to prevent excess moisture, it adds a tangy sweetness.
- Maraschino Cherries: Brighten the top layer with their vivid red hue and candy-like flavor.
For even more no-bake dessert ideas, check out our pecan cream pie recipe.
Pro Tip: Slice bananas just before assembling to prevent browning. A quick brush with lemon juice can also help keep them looking fresh.
4. Optional Enhancements
While the classic recipe is delicious on its own, these optional ingredients can elevate your banana split cake to new heights:
- Chopped Nuts: Add crunch and depth of flavor—walnuts or pecans work wonderfully.
- Chocolate Syrup: Drizzle on top for a finishing touch that ties in the banana split theme.
- Strawberries: Fresh or sliced, they add a sweet, juicy twist.
Selecting Quality Ingredients
For the best results, use fresh, high-quality ingredients. Look for ripe bananas without bruises, cream cheese with a full-fat content for maximum creaminess, and high-quality canned pineapple for bright, natural flavors.
With the essential ingredients in hand, you’re ready to bring your banana split cake to life. Next, we’ll guide you through the step-by-step instructions for assembling this no-bake masterpiece
Step-by-Step Recipe Instructions
Making banana split cake is as easy as layering your favorite flavors into a no-bake masterpiece. Follow these steps to create a dessert that will impress every time.

1. Preparing the Crust
The crust forms the sturdy foundation of the cake, offering a pleasant crunch to balance the creamy and fruity layers.
Ingredients for the Crust:
- 2 cups graham cracker crumbs
- ½ cup melted butter
- ¼ cup granulated sugar
Steps:
- In a mixing bowl, combine graham cracker crumbs, melted butter, and sugar. Mix well until the crumbs are evenly coated.
- Press the mixture firmly into the bottom of a 9×13-inch baking dish, using the back of a spoon or a flat-bottomed glass for an even layer.
- Chill the crust in the refrigerator for at least 30 minutes to set.
Pro Tip: For added flavor and a moisture barrier, drizzle melted chocolate over the crust before chilling.
2. Creating the Creamy Filling
This layer is what gives banana split cake its signature silky texture.
Ingredients for the Filling:
- 16 ounces cream cheese, softened
- 2 cups confectioners’ sugar
- 1 container (16 ounces) whipped topping
Steps:
- In a large bowl, beat the cream cheese and confectioners’ sugar together until smooth and creamy. Use a hand or stand mixer to ensure no lumps remain.
- Gently fold in the whipped topping with a spatula until fully combined, taking care not to deflate the mixture.
- Spread the filling evenly over the chilled crust, ensuring complete coverage.
3. Adding the Fruit Layers
The fruity layer is where the cake gets its fresh, vibrant flavor.
Ingredients for the Fruit Layer:
- 3–4 ripe bananas, sliced
- 1 can (20 ounces) crushed pineapple, drained
Steps:
- Arrange sliced bananas over the cream cheese layer, overlapping slightly to ensure a solid layer.
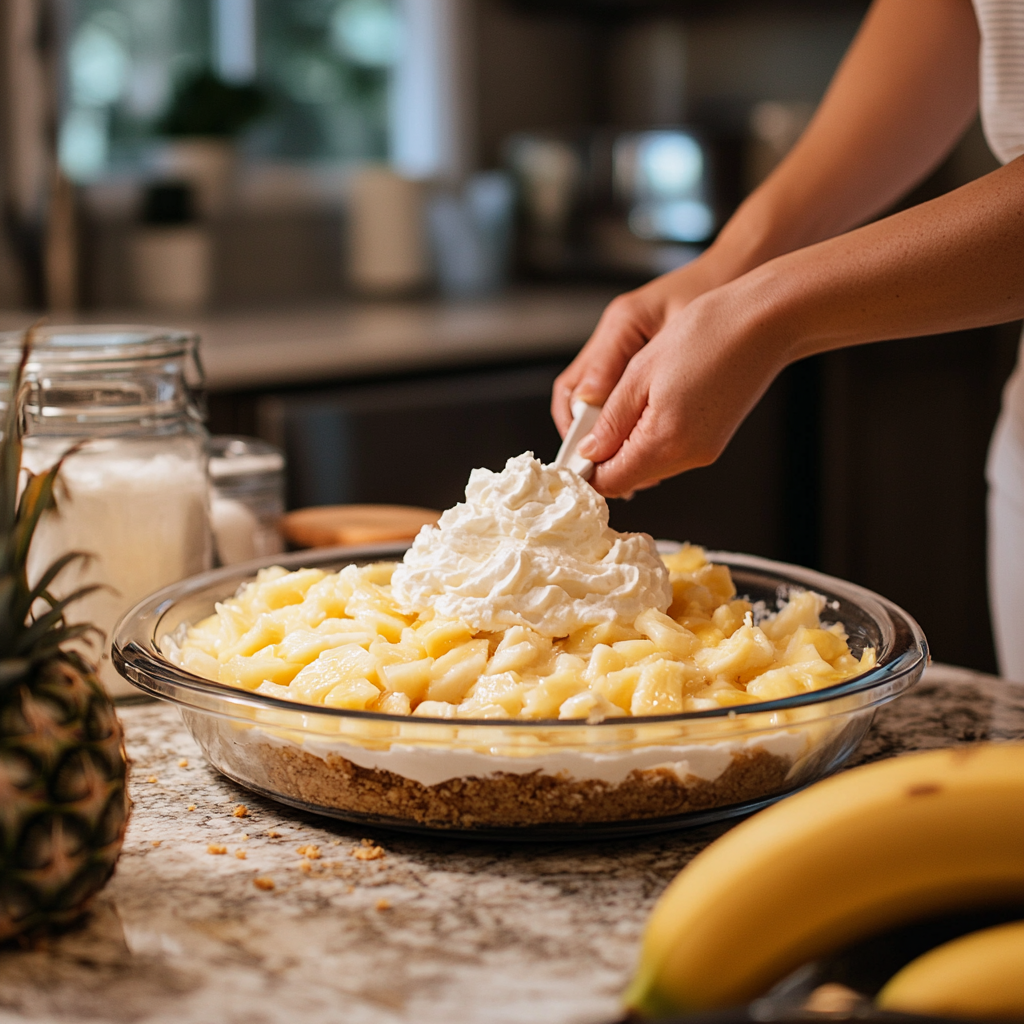
- Spread the drained crushed pineapple evenly over the bananas.
- Gently press down on the pineapple with a spatula to ensure it adheres to the cream layer.
Pro Tip: To prevent bananas from browning, dip the slices in a mixture of lemon juice and water before layering.
4. Finishing Touches
This final layer is where you can let your creativity shine.
Ingredients for the Topping:
- 1 container (16 ounces) whipped topping
- ½ cup chopped nuts (optional)
- Maraschino cherries for garnish
- Chocolate syrup for drizzling
Steps:
- Spread a generous layer of whipped topping over the pineapple, smoothing it out with a spatula.
- Sprinkle chopped nuts evenly over the top, if desired.
- Garnish with maraschino cherries and drizzle chocolate syrup in a decorative pattern.
Pro Tip: For a truly eye-catching presentation, arrange the cherries in neat rows or scatter them artfully across the surface.
5. Chilling and Serving
To let all the layers meld together and ensure the cake holds its shape, chilling is essential.
- Cover the baking dish with plastic wrap or aluminum foil.
- Refrigerate for at least 4 hours, or overnight for the best results.
- Slice into squares and serve chilled. Use a sharp knife and wipe it clean between cuts for neat slices.
Now that you’ve mastered the basics of banana split cake, let’s explore some creative tips for customizing this classic dessert to suit any occasion or taste
Tips to Customize Your Banana Split Cake
One of the best things about banana split cake is its versatility. Whether you want to accommodate dietary restrictions, elevate its presentation, or experiment with flavors, this dessert is highly adaptable. Here are some creative tips to help you make it your own.
1. Dietary Adaptations
Make your banana split cake suitable for everyone by tweaking the ingredients to meet specific dietary needs.
- Gluten-Free Version:
Replace graham cracker crumbs with gluten-free alternatives, such as gluten-free cookie crumbs or crushed gluten-free granola. - Dairy-Free Option:
Use dairy-free cream cheese and whipped topping substitutes. Coconut cream can also serve as a delicious alternative for the whipped topping. - Low-Sugar Alternative:
Swap out the sugar in the crust and filling for natural sweeteners like monk fruit or erythritol. Opt for low-sugar canned pineapple and use fresh fruit to reduce added sugars.
2. Flavor Enhancements
Get creative by adding new flavors or textures to the classic recipe.
- Chocolate Lover’s Twist:
Add a layer of chocolate pudding or mousse between the cream cheese and fruit layers. Top the cake with chocolate shavings for an indulgent touch. - Peanut Butter Delight:
Drizzle a layer of creamy peanut butter over the crust before adding the cream cheese filling. You can also sprinkle chopped Reese’s candies on top for extra flair. - Tropical Paradise:
Include diced mangoes or papayas alongside the pineapple for a tropical-inspired variation. Swap maraschino cherries for fresh coconut flakes.
3. Presentation and Serving Ideas
Transform your banana split cake into a stunning centerpiece with these tips:
- Mini Servings:
Create individual servings by layering the ingredients in clear cups or small mason jars. This approach is perfect for parties and makes serving a breeze. - Layered Parfait:
Build the cake in a tall trifle dish, showing off the colorful layers for a visually striking dessert. - Personalized Garnishes:
Provide a toppings bar with options like sprinkles, crushed cookies, and extra syrups, letting guests customize their slices.
4. Seasonal Variations
Take advantage of fresh, seasonal fruits to put a twist on the classic recipe.
- Summer Berry Bliss:
Swap bananas and pineapple for strawberries, blueberries, and raspberries. These berries add a tart freshness that’s perfect for summer gatherings. - Autumn-Inspired Treat:
Incorporate caramel-drizzled apples or pears, along with a dusting of cinnamon for a cozy fall vibe.
Feeling inspired by these creative ideas? Up next, we’ll tackle some common questions about banana split cake to ensure your dessert turns out perfectly every time.
For a deeper dive into this dessert, you can learn more about the history and variations of banana split cakes on Wikipedia.
Frequently Asked Questions (FAQ)
Banana split cake is a simple and delightful dessert, but a few common questions can help ensure success when making it. Here are clear and concise answers to frequently asked queries.
1. How long does banana split cake last in the fridge?
Banana split cake can be stored in the refrigerator for up to 2–3 days. To maintain freshness, cover it tightly with plastic wrap or store it in an airtight container. Keep in mind that bananas may darken over time, so it’s best to enjoy the cake as soon as possible.
2. Can I make banana split cake ahead of time?
Absolutely! This cake is a great make-ahead dessert. You can prepare it up to a day in advance and refrigerate it overnight. This not only saves time but also allows the flavors to meld together for a more delicious result.
3. Can I use fresh whipped cream instead of store-bought?
Yes, you can! Fresh whipped cream can be substituted for store-bought whipped topping. To stabilize it and prevent it from deflating, add a tablespoon of powdered sugar or a pinch of unflavored gelatin while whipping.
4. What’s the best crust for banana split cake?
A graham cracker crust is the most popular choice for its classic flavor and ease of preparation. However, you can experiment with alternatives like crushed Oreos for a chocolatey twist or crushed vanilla wafers for a lighter base.
5. How do I prevent a soggy crust
To avoid a soggy crust, ensure that the crust is firmly pressed and well-chilled before adding the layers. You can also add a thin coating of melted chocolate or spread a layer of peanut butter on top of the crust to act as a barrier against moisture.
Conclusion: Why You’ll Love Banana Split Cake
Banana split cake is more than just a dessert—it’s a slice of happiness that brings everyone together. Its vibrant layers of creamy filling, fresh fruit, and crunchy crust capture the essence of the beloved banana split, all while being incredibly easy to make. This no-bake treat is a perfect choice for any occasion, whether it’s a summer barbecue, a family gathering, or just a sweet indulgence for yourself.
With this guide, you now have everything you need to create your own banana split cake at home. From selecting the best ingredients to mastering the layering process and exploring creative customizations, the possibilities are endless. Whether you stick to the classic recipe or put your own spin on it, one thing is certain: this dessert is a guaranteed crowd-pleaser.
So, what are you waiting for? Gather your ingredients, follow these simple steps, and enjoy the magic of banana split cake. Don’t forget to share it with friends and family—it’s a treat worth celebrating!

